 Log in


AdorStore
Remote Button connector for ADOR
Remote Button connector for ADOR
FREE SHIPPING
Couldn't load pickup availability
NOTE: We now have the COMPLETE remote button kit, the EPB. Consider purchasing it instead of this product, because with this connector you still need wire and a switch. The EPB has it all.
The ADOR button on the front panel is a momentary, normally open switch. The connection pins on the ADOR electronic board are wired in parallel across this switch so the internal switch should still work.
With this two-wire connector, you can put a pushbutton switch (like an ordinary un-lighted doorbell switch) somewhere else. A remote switch should be placed where you can still see the door to see that it did as you wanted.
This kit comes with a "pigtail" of wires and a 2-pin female connector that slides over two pins on the connector for options. The pins stick up off the top of the board. The electronic board comes with a jumper that shorts out pin 1 and 2. So counting from right to left: 1, 2, 3, 4, 5, 6, you connect the remote button connector on pins 5 & 6. No polarity. Note that these two pins are closest to the front of the ADOR.

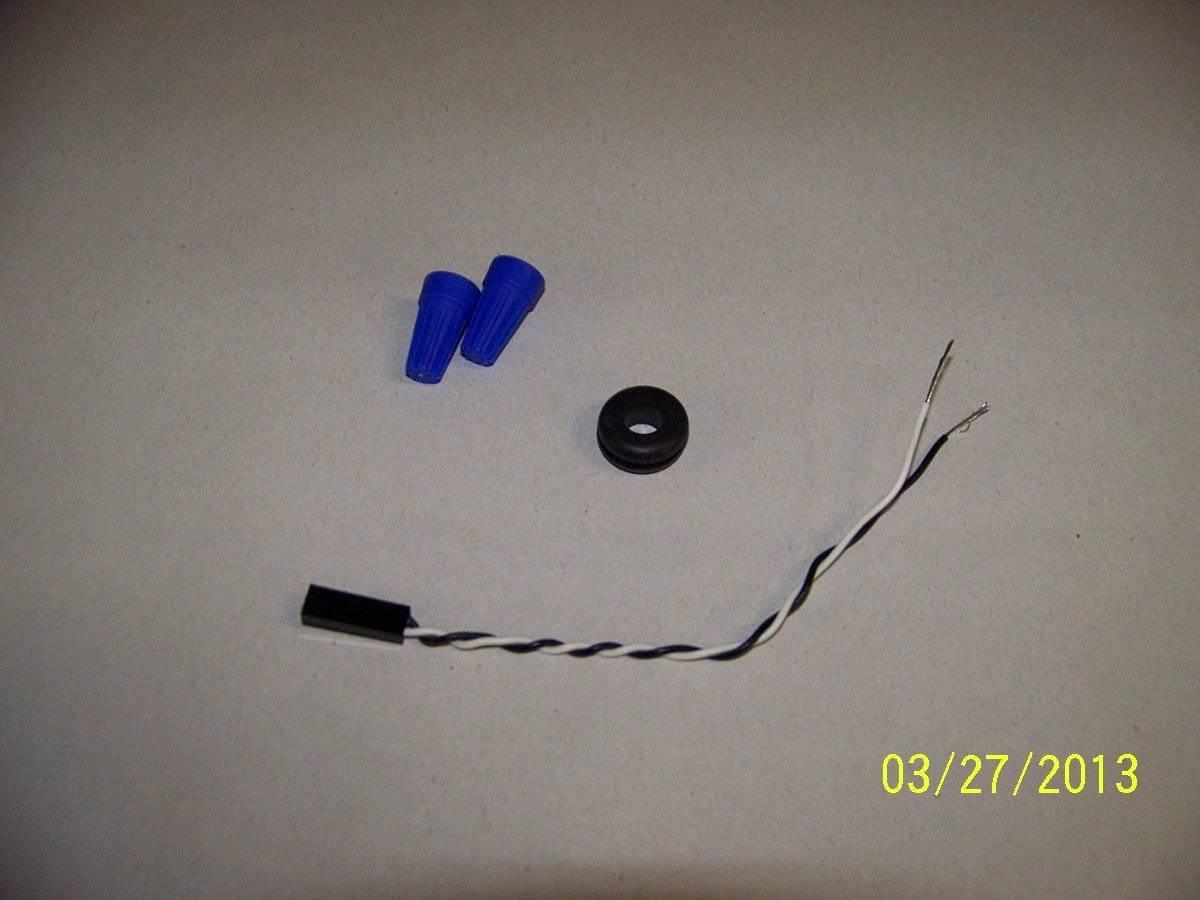
This is what you get. A rubber grommet and two wire "nuts" are provided so you can run a twisted pair of wire over to your momentary button switch. You don't need to drill a hole in the battery box: there is a hole covered by amber tape for the purpose of running the wires through.

In this picture, you see the jumper on pins 1 & 2 (for enabling the internal photosensor) and count down 3, 4, then pins 5 & 6. Pins 5 & 6 is where you will plug this external switch connector.
If you need the long wire and button, we can provide that with additional charge. There is a hole in the bottom of the box where you can slip in the grommet and pass the wire through. To keep dust and rain out of the box, it is a good idea to put clear caulk where the wire passes through the box.
Here is the Instruction Sheet that comes with this accessory.